Beginner's guide to creating a GNOME 2 applet with Python (Part I)
Posted on 25 February 2009 in Articles • 5 min read
Programming is an art. To be more specific, it's an everlasting art. There is no program that could completely satisfy a user. And I doubt that there is a program that could completely satisfy a programmer.
I spend hours in front of my computer. Of course that is very unhealthy for the eyes. I wanted to create a simple reminder applet - an eyes icon that changes to "bloody" eyes - indicating that it's time to relax.
This was my first GNOME applet, my first GTK and more or less serious Python experience and I'd like too share it with everyone, who deals with his or her first GNOME applet.
I hope, this tutorial will help you.
Part I: GNOME applet basics
Before we begin... Some technical information about my working environment. I used Ubuntu 9.04 and Python 2.6. So, when I'm saying that "this library loads files from here", I'm speaking of what I've found in my working environment. It could be different in yours.
1. Project's directory
First, lets create a directory for the applet. /home/user/applet/ (~/applet/) will do, of course you can create it as a symbolic link to your designated path. Here, /home/user/ is a path to your home directory. The source code of the applet will be located in /home/user/applet/src/ (~/applet/src/) directory.
2. How GNOME interacts with applets
In GNOME, an applet is a small application, designed to sit in the GNOME panel, providing quick and easy access to a control, such as a volume control, a clock, a network status display, or even a weather gauge [1].
Technically, applets are Bonobo controls [2] embedded in the Gnome panel. This means that there are few slight differences from stand-alone GNOME programs. The first difference is that each applet requires a 'server' file, which contains a description of the Bonobo capabilities [1].
GNOME searches for applet server files in /usr/lib/bonobo/servers directory.
The basic part of a simple server file contains server's id and location of an executable file (our file is a python script):
1 2 3 4 5 6 7 8 9 10 11 12 13 14 15 16 17 18 19 20 21 22 23 24 25 26 27 28 29 30 | <oaf_info> <oaf_server iid="OAFIID:SampleApplet_Factory" type="exe" location="/home/user/applet/src/applet.py"> <oaf_attribute name="repo_ids" type="stringv"> <item value="IDL:Bonobo/GenericFactory:1.0"/> <item value="IDL:Bonobo/Unknown:1.0"/> </oaf_attribute> <oaf_attribute name="name" type="string" value="Sample Applet Factory"/> <oaf_attribute name="description" type="string" value="Sample Applet's factory that launches the applet"/> </oaf_server> <oaf_server iid="OAFIID:SampleApplet" type="factory" location="OAFIID:SampleApplet_Factory"> <oaf_attribute name="repo_ids" type="stringv"> <item value="IDL:GNOME/Vertigo/PanelAppletShell:1.0"/> <item value="IDL:Bonobo/Control:1.0"/> <item value="IDL:Bonobo/Unknown:1.0"/> </oaf_attribute> <oaf_attribute name="name" type="string" value="Sample Applet"/> <oaf_attribute name="description" type="string" value="description"/> <oaf_attribute name="panel:category:" type="string" value="Utility"/> <oaf_attribute name="panel:icon" type="string" value="no-picture-yet.png"/> </oaf_server> </oaf_info> |
For simplicity, the 'factory' is called SampleApplet_Factory and home/user/applet/src/applet.py is the absolute path to the executable Python script.
So, the fist step is to create a server file in /usr/lib/bonobo/servers. Let's name it SampleApplet.server.
Note
The root privileges are required to work with the SampleApplet.server file. Remember to correct the /home/user/ path
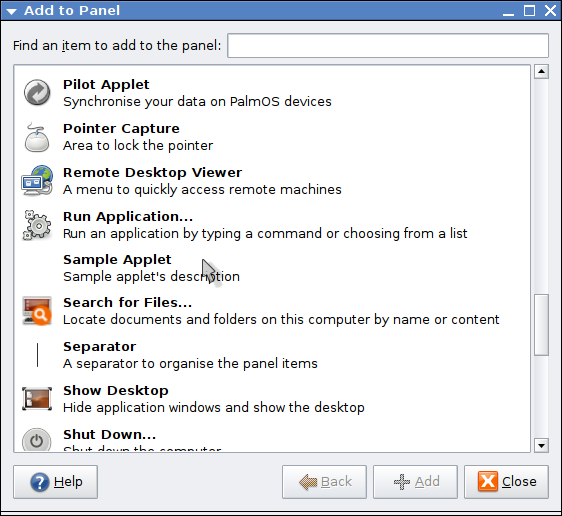
After that, the GNOME session could be restarted (restarting X-server via Ctrl+Alt+Backspace will do). Try adding the new applet to a panel. The dialog should look like this:

The applet's image is absent, because it doesn't exist in /usr/share/pixmaps. The applet engine searches for an image according to our .server file:
1 | <oaf_attribute name="panel:icon" type="string" value="no-picture-yet.png"/> |
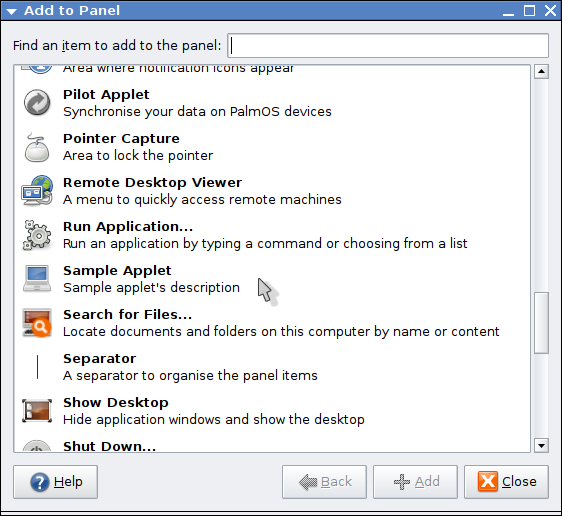
The value="no-picture-yet.png" string should be changed to value="gnome-laptop.png". After restarting GNOME session the "Add to panel" dialog should look like this:

If by accident the gnome-laptop.png is absent, it could be saved to /usr/share/pixmaps from here:

It's time to write a few lines of code.
3.1 Launching the applet
Let's start with creating an applet.py script file in ~/applet/src.
The next step, is to define the interpreter that'll handle the script (this is where programming starts):
1 | #!/usr/bin/env python
|
The /usr/bin is a standard directory on Unix-like operating systems that contains most of the executable files (i.e., ready-to-run programs) that are not needed for booting (i.e., starting) or repairing the system [3]
Some modules should be imported: The pyGTK module is needed to specify the GTK version used (2.x in this article), the gnome module, that contains all the useful classes and methods about the GNOME desktop environment, i.e. the applet class, and the gtk module, Python bindings for the GTK toolkit [4].
1 2 3 4 5 6 7 8 9 10 11 12 13 14 15 16 17 18 19 20 21 | import sys import gtk import pygtk import gnomeapplet pygtk.require('2.0') def applet_factory(applet, iid): label = gtk.Label("It works!") applet.add(label) applet.show_all() print('Factory started') return True if __name__ == '__main__': # testing for execution print('Starting factory') gnomeapplet.bonobo_factory('OAFIID:SampleApplet_Factory', gnomeapplet.Applet.__gtype__, 'Sample Applet', '0.1', applet_factory) |
The applet_factory function receives the object to be initialized (the applet) and the bonobo activation ID that the new factory will implement. It returns True if no errors were reported. Then the bonobo_factory function is called [4].
Note
Remember to change the mode of the applet.py file to +x (execute/search), e.g. by running chmod 755 ~/applet/src/applet.py
The bonobo_factory(IID,Type,Description,Version,Callback) arguments are: * IID: The bonobo-activation id of the factory. * Type: the type of the created object. * Description * Version * Factory callback: the name of the factory function
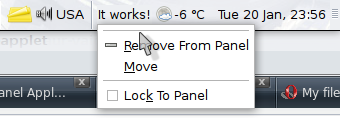
"It works!" label should appear on a panel:

3.2 Debugging routine
The print() function calls should print the text to the output stream. But where is the output? A common issue when developing an applet is the debug process which means, knowing what it's failing and why. As an applet is nothing but a GTK+ application we can use an additional command line argument like "run-in-window" to put it in window-mode by creating a GTK+ window and inserting the applet in it [4].
It could be done making some changes in the code:
1 2 3 4 5 6 7 8 9 10 11 12 13 14 15 16 17 18 | if __name__ == '__main__': # testing for execution print('Starting factory') if len(sys.argv) > 1 and sys.argv[1] == '-d': # debugging mainWindow = gtk.Window() mainWindow.set_title('Applet window') mainWindow.connect('destroy', gtk.main_quit) applet = gnomeapplet.Applet() applet_factory(applet, None) applet.reparent(mainWindow) mainWindow.show_all() gtk.main() sys.exit() else: gnomeapplet.bonobo_factory('OAFIID:SampleApplet_Factory', gnomeapplet.Applet.__gtype__, 'Sample applet', '0.1', applet_factory) |
A GTK window is created, its title is set and the 'destroy' signal is connected to the gkt.main_quit callback. It means that gtk.main_quit() will be automatically called, when the window is destroyed (closed). We create GNOME applet's instance and make it a child control (widget) of the window we've just created. The gtk.main() function runs the main loop until the gtk.main_quit() function is called [5]. The GTK+ main loop's primary role is to listen for events on a file descriptor connected to the X server, and forward them to widgets [6].
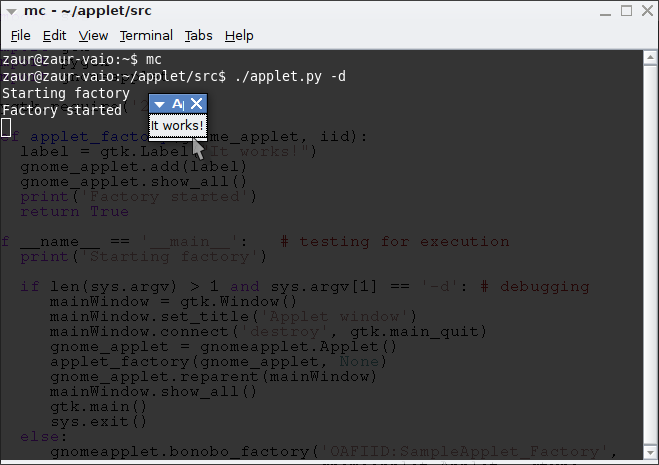
Now the applet can be launched from a console with the -d key, e.g. ./applet.py -d. The applet should appear in a window. It's a common GNOME window:

References
| [1] | (1, 2) http://projects.gnome.org/ORBit2/appletstutorial.html |
| [2] | http://en.wikipedia.org/wiki/Bonobo_(component_model) |
| [3] | http://www.linfo.org/usr_bin.html |
| [4] | (1, 2, 3) http://www.pygtk.org/articles/applets_arturogf |
| [5] | http://www.pygtk.org/docs/pygtk/gtk-functions.html |
| [6] | http://developer.gnome.org/doc/GGAD/sec-mainloop.html |