Beginner's guide to creating a GNOME 2 applet with Python (Part II)
Posted on 19 August 2009 in Articles • 4 min read
Part II: GNOME applets and PyGTK
Before we begin...
If you have read part I of the tutorial, and have a test applet running in both "panel" and "debug" mode, you would have no problems running all the code described below. All terms described in part I, keep their meanings here so, if you have not read the article, you can do it now.
1. Launching an applet
Generally, a GNOME applet could be treated as an application "attached" to the panel through Bonobo component model system [2]. We can launch the sample applet in a standard GNOME window with the -d key [1]. Yet, for example creating and attaching a menu to an applet is not the same task of creating a menu for a windowed application. Or, an applet will always be vertically-oriented" in debug-mode. So, this time the applet will be added to a panel during all test-runs.
Note
If the sample applet doesn't appear on a panel, it means, that something went wrong (a possible bug in a script). Try launching the applet in debug mode to see the output and catch possible bugs.
2. Popup Context Menu
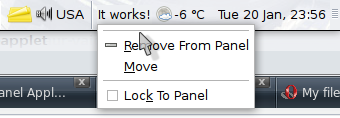
Every applet has a basic context popup-menu with three (at least in GNOME v2.26) items:
According to the GNOME documentation library [3], the only way to extend this menu is to call the following function:
1 2 3 4 | void panel_applet_setup_menu (PanelApplet *applet, const gchar *xml, const BonoboUIVerb *verb_list, gpointer user_data); |
The corresponding method in Python is Applet object's setup_menu(xml, verbs, user_data) method.
The required xml string is in a very easy-to-understand XML format:
1 2 3 4 5 6 7 8 9 10 11 12 13 14 15 | <popup name="button3"> <menuitem name="ItemPreferences" verb="Preferences" label="_Preferences" pixtype="stock" pixname="gtk-preferences"/> <separator/> <submenu name="Submenu" _label="Su_bmenu"> <menuitem name="ItemAbout" verb="About" label="_About" pixtype="stock" pixname="gtk-about"/> </submenu> </popup> |
The example above creates a menu of two items, a separator between them and a single sub-item:
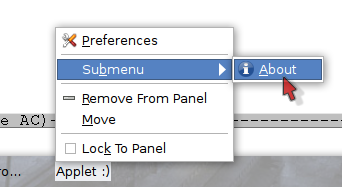
As you can see, the Preferences and About icons are set from the current environment's theme. So, pixtype="stock" and pixname="gtk-about" attributes mean that an icon from GTK stock collection named "gtk-about" [4] will appear in a menu item. The name and label attributes define menuitem object's name and label properties. The underscore (_) character defines a shortcut to a menu.
The verb attribute is crucial for each menuitem node. The name of each verb links a menuitem and a callback function.
1 | verbs = [('About', show_about), ('Preferences', show_preferences)] |
To link the menus and the verbs list to an applet, the setup_menu() method is called:1
1 | applet.setup_menu(xml, verbs, None) |
Where None is a "user data" (could be any python data object or None).
Finally, all snippets described above, plus callback functions will look as follows:
1 2 3 4 5 6 7 8 9 10 11 12 13 14 15 16 17 18 19 20 21 22 23 24 25 26 27 28 29 30 31 32 33 | def create_menu(applet): xml="""<popup name="button3"> <menuitem name="ItemPreferences" verb="Preferences" label="_Preferences" pixtype="stock" pixname="gtk-preferences"/> <separator/> <submenu name="Submenu" _label="Su_bmenu"> <menuitem name="ItemAbout" verb="About" label="_About" pixtype="stock" pixname="gtk-about"/> </submenu> </popup>""" verbs = [('About', show_about), ('Preferences', show_preferences)] applet.setup_menu(xml, verbs, None) def show_about(*arguments): print(arguments) def show_preferences(*arguments): print(arguments) def applet_factory(gnome_applet, iid): create_menu(gnome_applet) ... ... |
Try launching the applet in debug mode, and printing out the *arguments list in show_about() and show_preferences() functions.
The result should be similar to:
1 | (<bonobo.ui.Component object at 0x963f5cc (BonoboUIComponent at 0x969dac0)>, 'About' |
Also try changing the None argument in setup_menu() method to e.g. 'Hello!' string and then printing out the *arguments list one more time. This time, the result should look like:
1 | (<bonobo.ui.Component object at 0x963f5cc (BonoboUIComponent at 0x969dac0)>, 'About', 'Hello!') |
Now, you can change the callbacks' definitions
1 | def show_about(*arguments): |
to
1 | def show_about(obj, label, *data): |
which slightly clarifies the code.
3.1 Applet's orientation
An applet could be set up both on a horizontal or vertical panel. This should be taken into account before creating the visual elements of an applet. Also an applet's orientation could be changed by user (dragging an applet from a horizontal panel to vertical panel), in this case a callback for the change-orient signal should be created [5].
1 2 3 4 5 6 7 | def change_orientation(applet, orient, user_data): pass def applet_factory(applet, iid): applet.connect('change-orient', change_orientation) ... ... |
The code below demonstrates how change-orient signal could be used:
1 2 3 4 5 6 7 8 9 10 11 12 13 14 15 16 17 18 19 20 21 22 23 24 | def applet_factory(applet, iid): # initialize an orientation-dependent label orientation = applet.get_orient() if (orientation == gnomeapplet.ORIENT_UP or orientation == gnomeapplet.ORIENT_DOWN): label = gtk.Label("Vertical") else: label = gtk.Label("Horizontal") # label is the user data applet.connect('change-orient', change_orientation, label) ... ... def change_orientation(applet, orient, user_data): orientation = applet.get_orient() label = user_data if (orientation == gnomeapplet.ORIENT_UP or orientation == gnomeapplet.ORIENT_DOWN): label.set_label("Vertical") else: label.set_label("Horizontal") |
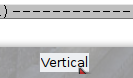
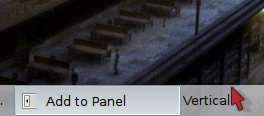
The applet was added to a vertical panel:
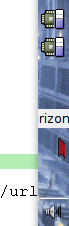
Then, dragged to a auto-hidden horizontal one:
3.2 Applet's background
The GNOME panel has three background options:
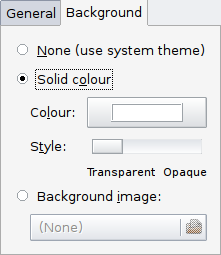
And an applet can detect these options' changes via the change-background signal [6].
But in practical situations, an applet doesn't respond to the panel's background changes. What really matters is an applet's background transparency. This is where the power of GNU helps: the sources of GNOME trash applet contain a "hack" line of code that makes an applet transparent. In Python it is:
1 2 3 4 | def applet_factory(applet, iid): applet.set_background_widget(applet) # /* enable transparency hack */ ... ... |
Now, the applet should look like this:
That's it! This is the end of the second part of the tutorial. There is not much left to say about the applet techniques. But there is much to learn about PyGTK (creating dialogs, different widgets, signals, etc.). A great tutorial is available at the official site http://www.pygtk.org.
References
| [1] | Beginner's guide to creating a GNOME applet with Python (Part I) |
| [2] | Bonobo component model |
| [3] | The PanelApplet object |
| [4] | GTK stock items |
| [5] | www.pygtk.org - GNOME applet with python |
| [6] | The "change-background" signal |